The damn thing just sat there on a shelf, collecting dust, waiting for me to do something about it. With the red wire broken away from the board power connection, the quadcopter had been rendered nonfunctional, trapped months on end in virtual limbo. Repairs would require the tiniest of tools, the steadiest hands, and ablest eyes possible. Thus following that fatal crash last summer, this daunting task remained undone through autumn, and well into winter. Additional motivation was necessary to get me started on this particular project.
Found the inspiration I needed after noticing Heather’s GSR2 Biofeedback Machine pitifully languishing in the garage, told simply that it had “stopped working” some years ago. Cracked into that classic beige plastic case, discovered a dead 9volt battery, corroded hard to the terminals. Broke both connections trying to remove the battery, so immediately purchased a cheap replacement from eBay. Part arrived in the mail, making it a simple task to cut out the old battery harness, and solder in two wires connecting up the new 9volt terminal. With fresh battery installed, screwed the halves back together, and immediately heard familiar audible tone providing ‘feedback’ when fingers touched the polished metal contacts. First electronic repair… successful.

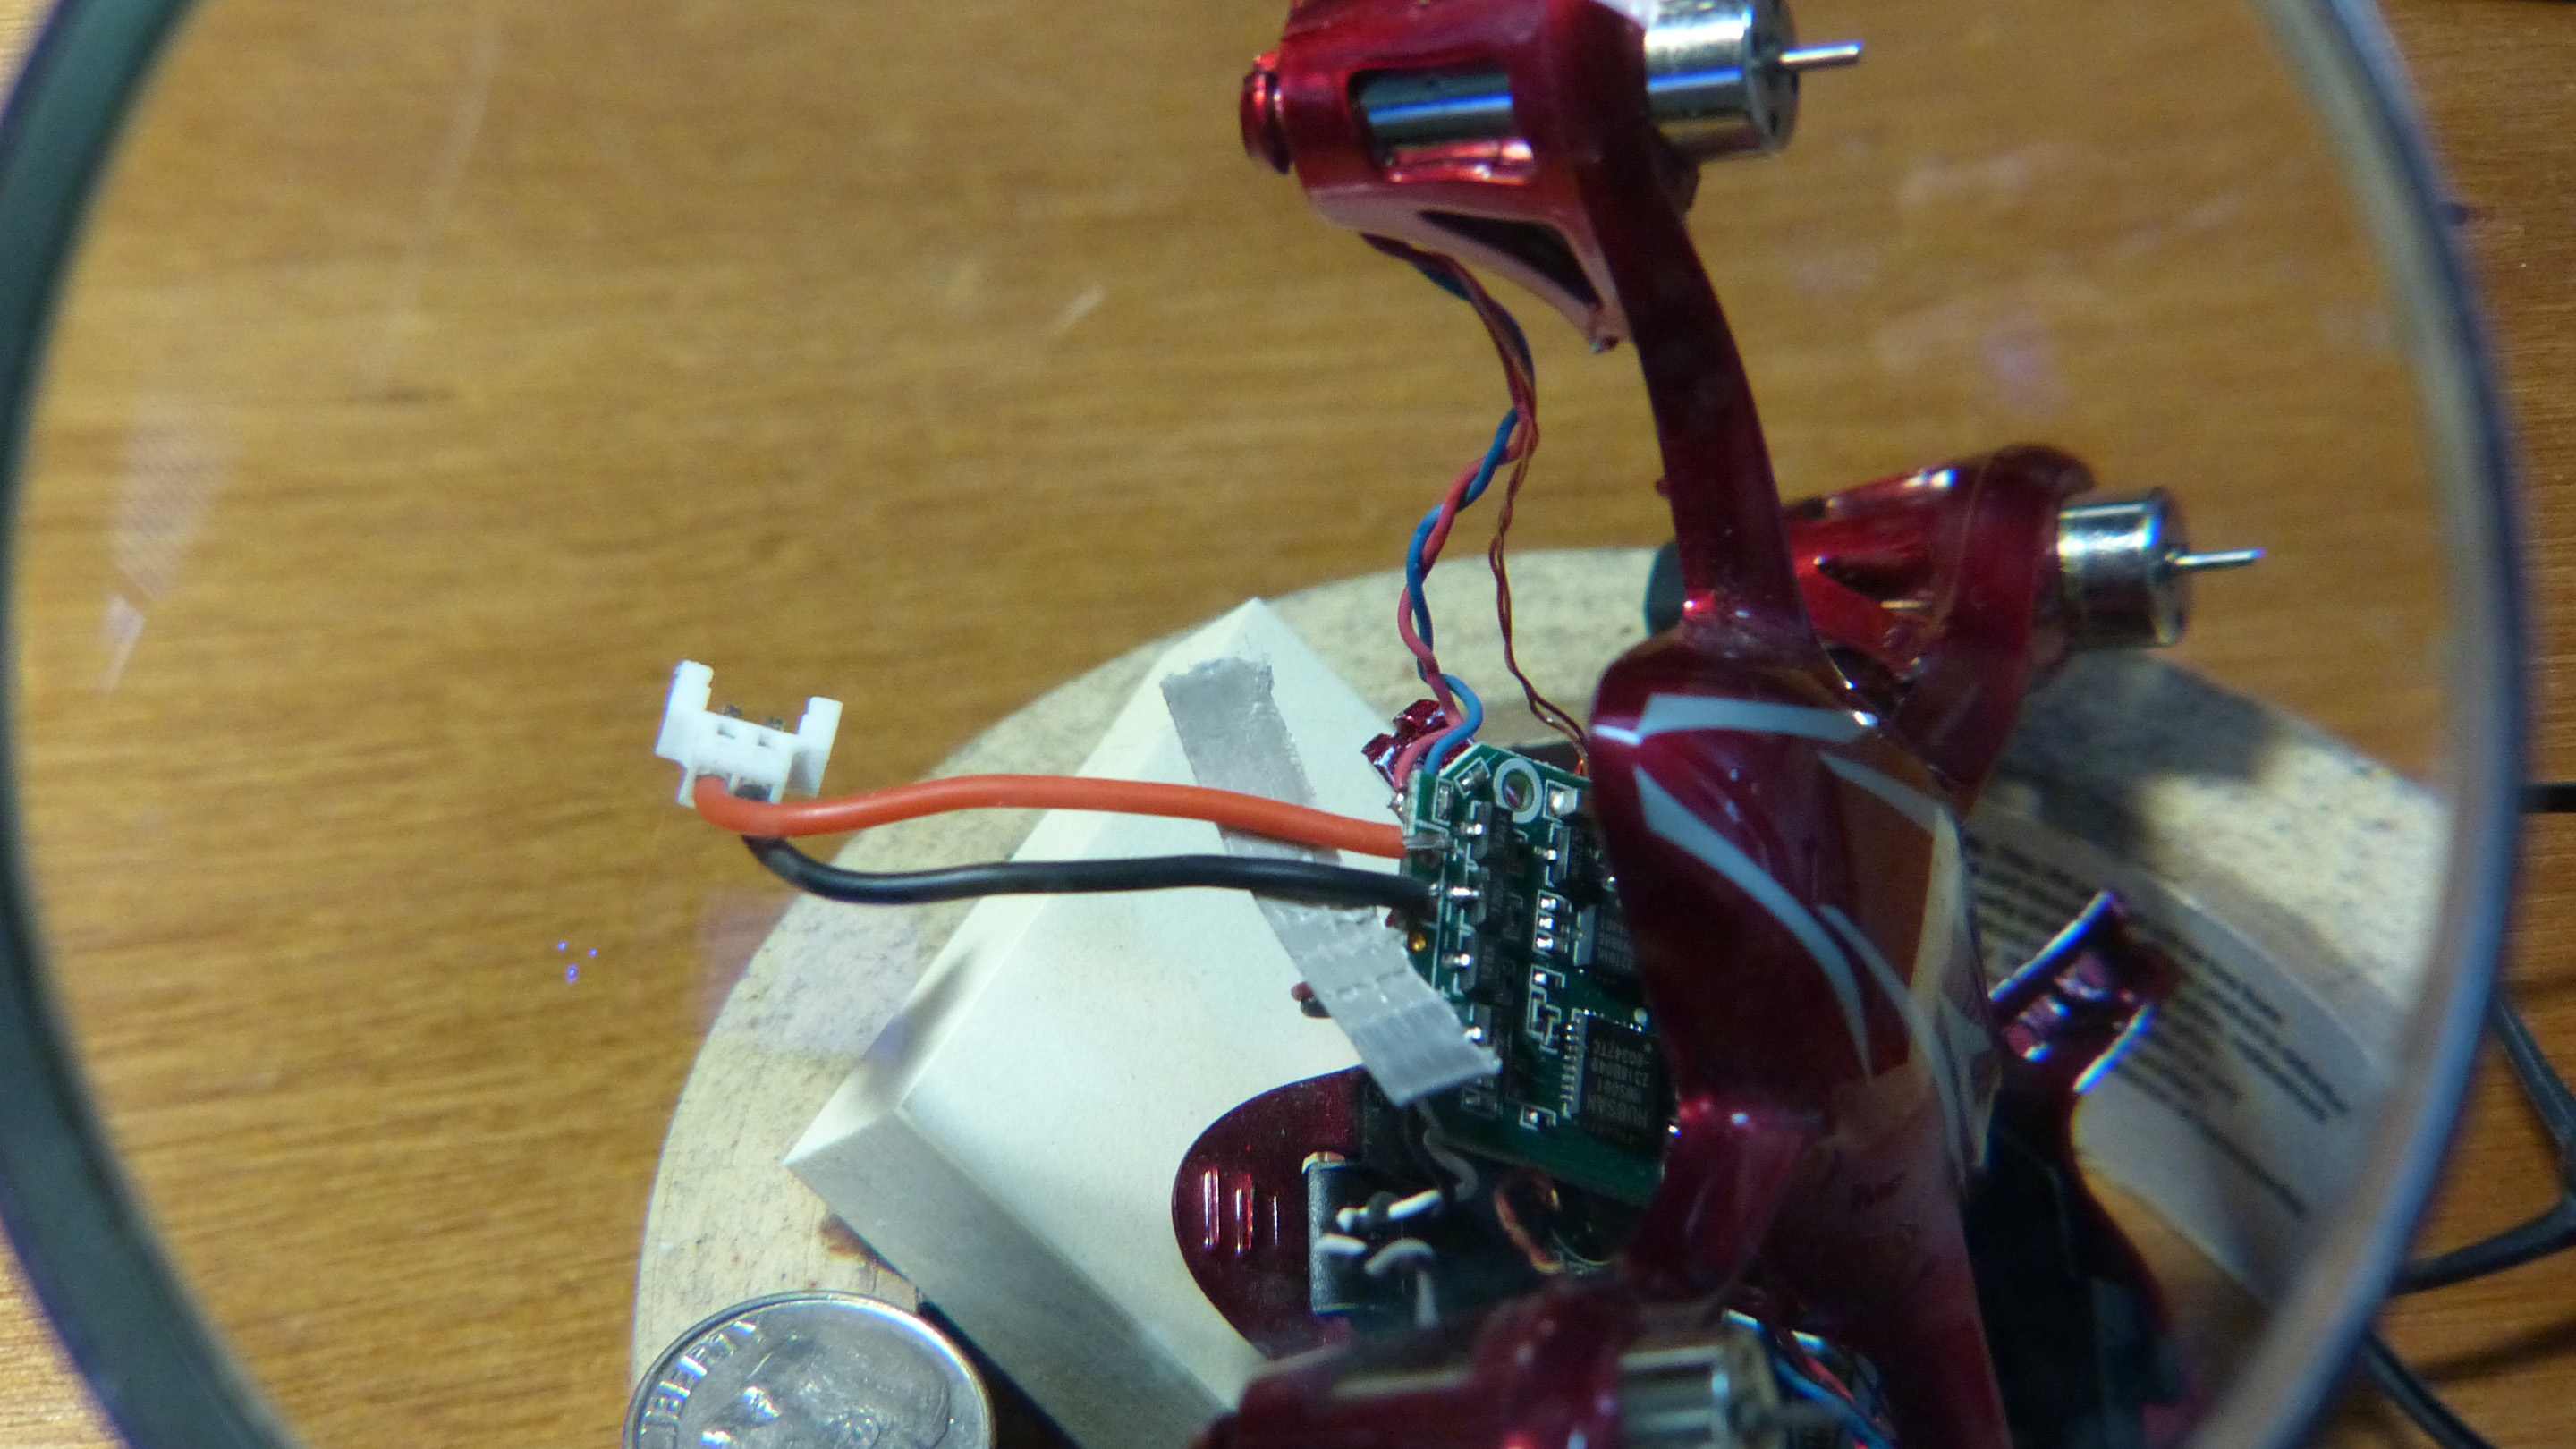
Around me lighting has been optimized, I’m wearing my reading glasses, and looking through an old magnifying lens. Wet the soldering tip, I reach in very slowly, and place a minute drop of solder upon the waiting red wire. Holding the hot tip in place for a second or two, the dab rolls off to the wire, and I quickly pull away. Looking back more closely, I find an oversize but solid silver blob securing wire to its proper place, millimeter perfect. It’s done, success, everything according to Plan! All that remained was reassemble the parts, and replace things as they were before. Gently pressed wires into the plastic chassis, and prepared to snap plastic shell halves together. Then, without a sound or even a tug, I noticed two more wires had broken free of the controller board.
Long, very tense pause… Extremely frustrated with self, this definitely was not part of my original Plan. Found these two wires had snapped from the flip side of the controller board, more or less under and offset from the main power wires before. As these wires fed juice to the camera module, I knew my only reasonable course of action: There were now two more tiny wires in need of soldering here. Carefully leaning same loose parts over to the other side, stared down at two wires half the size of the previous one, with terminals that much closer together. Once more, a small dribble of solder on a hot iron tip, reached in and fix red wire first, then another quick dab, hold black wire down a couple seconds, then smoothly pull hand out again. Looking anxiously down through the magnifying lens, I find large blobs of solder holding both wires firmly affixed to their proper terminals. Breath out a huge sigh of relief.
Wanting to make a fresh start, installed a fresh battery from supplies box, and as well as four new propellers while I was at it too. A half an hour later, battery charged and connected, finally time for the first big flight test. Lights come on, motors power up, the quadcopter leaps into the air at long last! Yeah! Can see small blinking LED beneath indicating the video camera is also operational. Flying down hallway, and hovering around our living room, annoyed both Leo the cat, and wife Heather, who said the noisy thing was giving her a big headache, so please stop. Mission Accomplished!
Must admit this amazing quadcopter makes for a fun distraction, but it essentially is little more than just a toy. On the plus side, these Hubsan X4 Quadcopters are just small enough that they don’t need an FAA Drone license. Yet with overall poor video recording quality, and being vulnerable to even light wind, they are easily damaged, or simply lost in the weeds. Unfortunately, while the high pitch sound of four whirling propellers can be annoying, I’m rather reluctant to take this quadcopter back outside anytime soon.
Certainly felt good fixing Heather’s GSR2 Biofeedback Machine for her, and it’s sure fun to play with my little quadcopter again. However, I’m honestly more pleased by my just getting the tasks done successfully. With hands seemingly less steady, and eyesight not nearly as keen, it is a relief to know that when necessary, this aging body can still successfully “monger” away at small, technical repairs of this sort. It’s not about the knowledge, or degree of precision required, but the feeling of genuine satisfaction from being able to fix the thing, more even than to have the damn thing fixed… If that makes sense to anyone else but me.